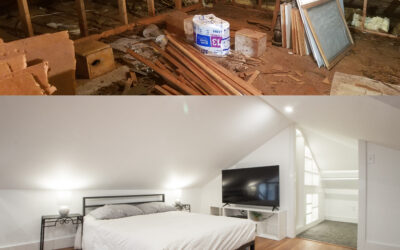
What Is a Step Flashing & What Does it Do?
Step flashing is a series of individual metal pieces installed where a roof surface meets a vertical wall, such as a chimney or dormer. Each piece is woven between an interlocking shingle course, with one half of the step flashing extending across the roof and the other rising vertically against the wall. Installed correctly, step flashing directs water away from the roof-to-wall transition and onto the roof’s surface, preventing it from sneaking behind siding or seeping through mortar.
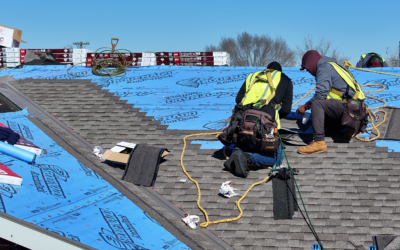
Bonderized aluminum step flashing. When installed on a roof, it is staggered with corresponding shingles to protect the roof-to-wall transition from water infiltration.
Expected Service Life of Step Flashings
While manufacturing material and quality certainly vary, most step flashings are made with the expectation that they can last the lifespan of the primary field shingle of the roof itself (asphalt shingles). That is to say, 20-30 years is reasonably common. However, this is based on the assumption that the step flashing was replaced at the same time as the rest of the roof, which is not always the case. Owing to the need to manipulate siding, step flashings are time-consuming to replace, and one of the most common items left as-is when discount roofers are trying to save costs on a job.
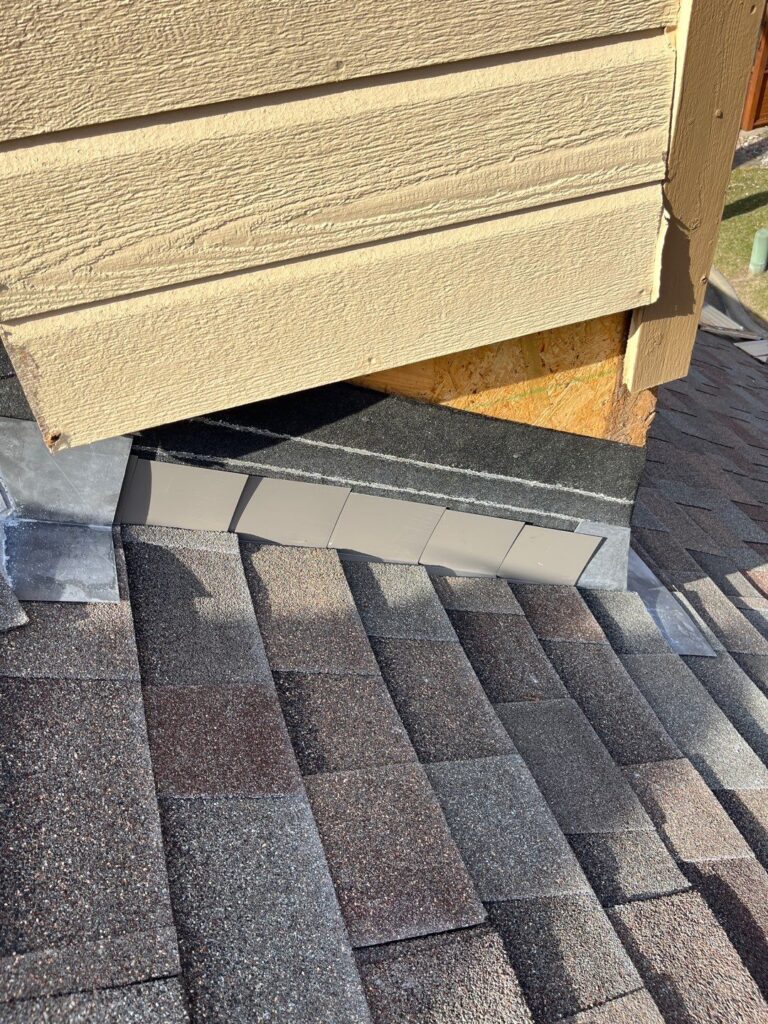
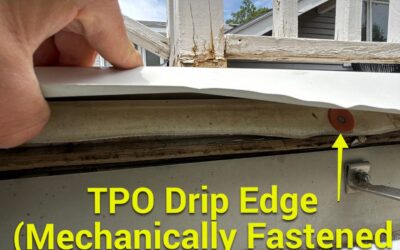
Step flashing at the side of a sided chimney. Ice and water shield, a self-adhering waterproof membrane, is always recommended at roof penetrations to prevent water infiltration. This is the black material behind the step flashing. Together, along with a cricket up slope and apron flashing down slope, they protect otherwise vulnerable roof penetrations.
Evaluating & Addressing Step Flashing Condition at Different Lifecycle Stages
0-5 Years: New Installation – Evaluating for Correct Installation
Step flashings are usually either aluminum or steel. You can find out by using a magnet to see if the material is ferrous – magnets stick to steel, but not aluminum. When new, step flashings will be smooth, and tightly layered. Metals are often anodized or power-coated to match the desired look with the rest of the roof, but can also be painted on-site. On-site paint doesn’t tend to hold up as well, or could be a sign of re-used flashings that are older than the rest of the roofing materials. Some common errors we see with step flashing installations that you can look for are:
- Reused flashings that are older than the roof. If you can see two sets of nail holes – former nail holes that have been sealed (hopefully) but no longer have nails in them, it is probably because the step flashings were pulled up and reused when the roof was last replaced. Another sign that you may have flashings that are older than the roof is if they have been painted after the fact, coating the older metal.
- Exposed nail heads or loose nails. Typically, all the nails on a step flashing are covered: either by the siding (for the wall-side nails), by the shingles (which are installed after the flashing), or by the step flashing above (which are installed from the bottom of the roof first and overlapping upslope to prevent water from running under any layer of materials). Sometimes the top row of step flashing will have 1 or two nail heads exposed, which need to be sealed with caulking or roofing sealant. If those, or any other nail heads are exposed/loose, take a look at our article on How to Properly Caulk Exposed Nail Heads for info on material compatibility and best practices with roof sealant.
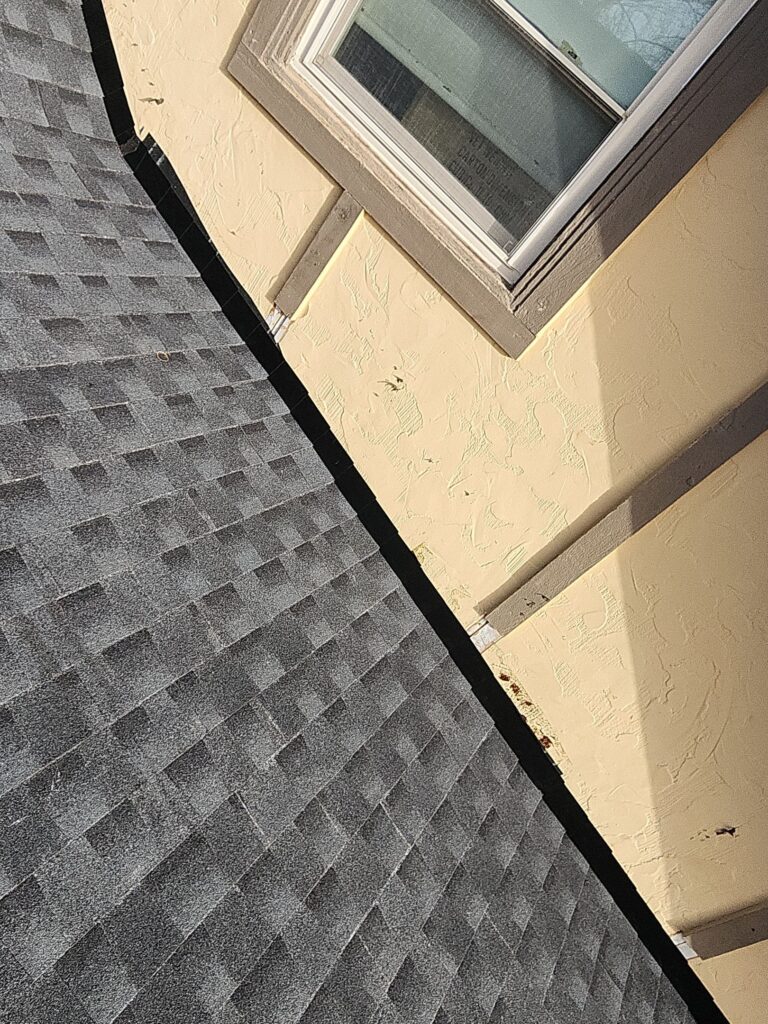
- Siding not cut away above step flashings. A minimum of 1” gap should exist between the bottom of the siding and the top of the roof surface. This is to prevent wicking of water into or behind the siding. If the siding touches the roof surface, it needs to be cut away higher to avoid wicking. This is where the step flashing is useful, to provide a non-porous metal surface that is weather-resistant for that exposed face.
- Incompatible size for roofing material. Step flashings should match the “exposure” – or length of the visible part of each row of shingles. Some manufacturers, such as specialty shingles, have longer shingles for aesthetic purposes. These should have corresponding step flashing lengths. Similarly, older houses that have been converted from wood shake (with long row exposure) to asphalt shingles need to change the size of step flashing used. If a roof was redone with different material type, then you can end up with the wrong size flashing.
5-25 Years: Normal Weathering – What to Monitor
With prolonged exposure to the sun/UV radiation, signs of age will show up on the metal step flashings. Step flashings are typically protected by either counterflashing, siding, or a cornice in some cases. When it is directly exposed to the elements, it weathers like any other metal. Each step flashing metal weathers differently. The typical signs of aging for step flashing are:
Aluminum Step Flashings
- Develops mild surface cracking on powder-coated color finish.
- Texture may lighten as coating wears.
- Coated aluminum fades over time.
- More susceptible to cosmetic marring (e.g., dents and mild wrinkling) from storms or foot traffic.
Steel Step Flashings
- Heavier and more rigid, so they retain their shape better.
- More prone to oxidation and rust if the coating is abrased.
Galvanized Step Flashings
- May begin showing white mineral staining as the zing coating wears off.
- Can develop darker staining where scratched by branches or other wear.
Maintenance: None, or light cleaning. For the most part, if this describes your step flashings, you’re still very much in good shape. You can clean dirt and plant debris off the surface, which tends to accumulate at the edge of the shingle and can act as a sponge to hold water for longer periods after rain and speed up deterioration.
20-40+ Years: Failure & Replacement – Knowing When It’s Time
The functional life cycle of a roof component is determined by its ability to keep water out. The transition from normal aging to concerning wear isn’t always clear. To clarify what these thresholds are, we created an inspection checklist to standardize our recommendations, ensuring that suggested only when it’s necessary. Similar to how an insurance adjuster defines “totaled” on a car, we only recommend component replacement when the cost to replace a component or roof is less than the potential cost of damages over the next 12 months.
Unfortunately, as step flashings are integrated into the layers of roofing and siding, they are difficult to replace. When only a few are damaged, it is possible to swap out just those ones. More often, though, a whole slope of roof may need to be replaced to properly seal the edge if step flashings are failing. Therefore, we are very cautious about prescribing step flashing replacement. Based on our experience identifying and fixing roof leaks on over 13,000 homes and buildings, here are our criteria for when we recommend replacement of step flashing:
- Corroded metal deterioration with active pitting rust.
- Splits along the fold line of the step flashing.
- Abrasive damage more than half the thickness of the material – such as from a branch falling or maintenance error.
- Water intrusion – If any amount of moisture is weeping through the barrier along the pipe and into the building, the pipe boot needs to be replaced. Signs of water inside will be visible as discoloration to surrounding wood or insulation, grime lines or staining on the pipe itself within the attic, mold, or spots on drywall below.

This article is part of our ‘Roof Component Inspection & Service Life’ Series. Learn more about:
Roof Covering
Flashing
Roof Vents
Roof Drainage