Note: At Rhoden Roofing, we don’t perform chimney resealing ourselves; however, we’re familiar with the process and regularly coordinate with trusted masonry subcontractors during roof replacements.
Learning to reseal a brick chimney on a roof is a handy skill to have if you’re a homeowner and a do-it-yourselfer. Brick chimneys need resealing periodically, as does the flashing, ridge cap, and any vents mounted to the roof. Sealant is not a permanent fix, so it will eventually need reapplied.
Over time, roofs and their components endure more UV radiation than any other part of the home. It degrades caulk, sealers, and other products meant to extend the life of the roof. Keeping these areas maintained is the best way to avoid expensive repairs in the future.
One of the more involved resealing projects DIYers face includes resealing masonry. Any masonry that touches, or extends from, the roof’s surface must be sealed properly to avoid water damage to the attic. The material used to reseal masonry includes sealers, flashing, caulk, and other waterproofing materials.
This article details what brick chimneys are and how to identify their components, as well as how to seal them and other roof penetrations. We will discuss how the pros assess the condition of these components, and how they safely make the necessary repairs.
Understanding Your Chimney

A red brick chimney with new flashings and three chimney caps. Cut-in counterflashing is visible on its sides while base flashing is visible on its downslope side. Cut-in counterflashing doesn’t require sealant to be waterproof unlike surface-mounted counterflashing, but it’s often used as a redundancy.
What Makes a True Brick Chimney?
A brick chimney is built up from the foundation and through the roofline using clay bricks, mortar, and flue tiles. A brick chimney will never sit on wood, but rather on concrete footings. The exterior of a brick chimney is made from bricks and mortar, and the interior flue tile is often made from clay or cement.
Terra cotta flue tiles are commonly used. They can be recognized by their natural red color. Concrete flue tiles are typically gray and mortared into the top of the chimney. Then a chimney cap is installed over the flue tile to prevent rainwater from entering the chimney.
Periodic resealing of the mortar joints helps the chimney maintain its defense against water intrusion, which can weaken the mortar over time. UV damage and hail or debris impacts can open voids in the bricks, which can fill with ice and expand, cracking the brick.
Many homeowners today prefer to apply a liquid sealer from a sprayer, especially if they plan to reseal the entire chimney, not just a few cracks. Spraying sealant makes sealing the entire chimney surface faster and easier. Most are applied like a deck sealer, which can often be thinned with water if needed for spraying. Spray sealer can be applied in extra coats as needed, as long as the prior coat has begun to dry.
However, be aware the work should be done on a temperate day with plenty of sunshine and calm winds. Pros avoid spraying chimney sealers on windy days as this can blow the sealer onto nearby cars and windows.
How to Identify a Real Brick Chimney
Not all chimneys are what they appear to be. In modern chimney construction, materials are available that simulate masonry so closely that it can be difficult to know for sure which chimney type you have. You may need to physically inspect the chimney up close to be sure.
To determine if your chimney is truly brick:
- Look inside the firebox and shine a flashlight upward through the damper. If you see masonry going all the way up, it’s a brick chimney.
- Check the top of the chimney for continuous brickwork.
- In unfinished areas like a crawlspace, inspect the base of the chimney for concrete footing. Wood framing or no framing suggests it’s not a true brick chimney.
Can You Reseal a Sided Chimney?
Most chimneys on homes built today are made from lumber, not masonry. These chimneys are tall, hollow columns that often sit on doubled floor joists. Lumber does not weigh as much as masonry, so concrete footing isn’t required to support them, other than the foundation of the home.

In many cases, these chimneys are covered in OSB, house wrap, and siding. The siding may be a fiber cement siding like HardiPlank, composite siding made from OSB and painted, or vinyl siding. These will usually have a wood grain texture and use caulk and paint for resealing instead of masonry sealers.
Can You Reseal a Stucco-Clad Chimney?
Stucco chimneys can be especially deceiving in their appearance. Stucco can be applied over metal lathe (a form of metal netting), or bricks and other masonry. A common project is to stucco a brick chimney in disrepair to cover the damage. It’s like reupholstering your chimney. This is easier than brick work, and it can update the home’s appearance.
You can reseal a stucco chimney, whether the stucco is attached to metal lathe or masonry. Most masonry sealers are designed for use with brick or stucco but always check the label before use to be sure. Most sealers are applied over stucco in the same way as they are applied onto brick.
How to Identify Faux Brick Chimneys
Traditionally, a brick chimney uses bricks made from clay, a cement flue pipe, and mortar to hold everything in place. Today, the appearance of brick can be achieved with faux brick panels and vinyl siding that simulates brick. Most faux brick facades accept sealers made specifically for them, such as cementitious or panel-based masonry veneers.
Faux brick panels are made from thin slices of real brick, which are adhered to a backing sheet often made of fiberglass. Each panel usually covers a couple of square feet, so installation can be completed quickly. Pros tend to use button cap nails and construction adhesives to attach the panels to the subsurface, which is usually made from OSB.
If you cannot find evidence of real masonry by inspecting the inside of the chimney, look for any remnants of house wrap around the chimney’s top opening. Faux brick panels require some sort of waterproofing membraneMaterial - A single-ply membrane is a roof covering that uses one continuous layer of material to waterproof low-slope roofs. More to be installed under the panels, but real masonry will not use house wrap.
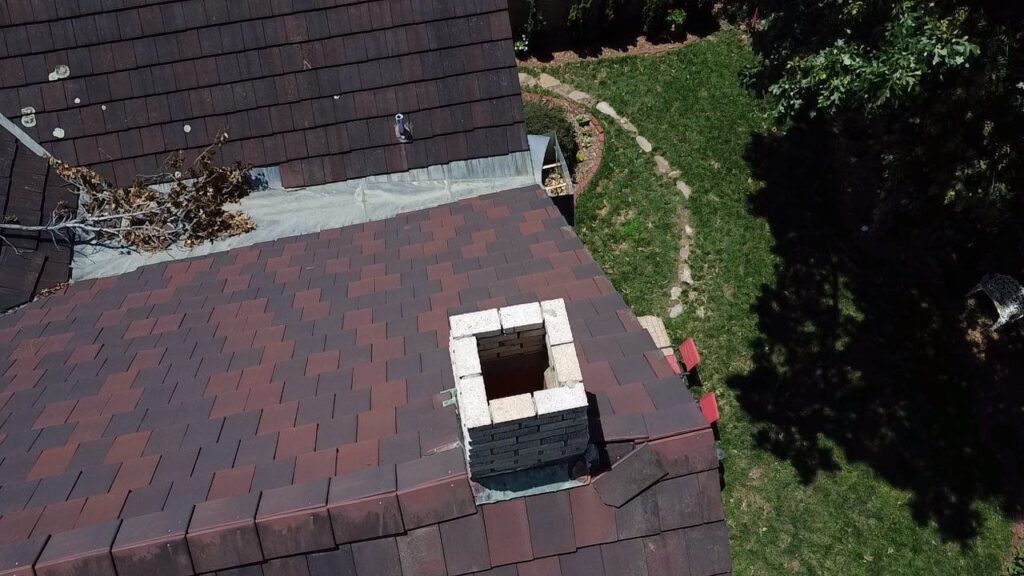
We recommend caps for most brick chimneys, which this chimney doesn’t have. However, this lets us view down the top of the chimney and see continuous brickwork with no underlayment or housewrap, which suggests that this is a true brick chimney.
Why and When to Reseal Your Brick Chimney
Why Do You Need to Reseal a Brick Chimney?
Some chimneys have survived for a hundred years without apparent resealing. How is that possible?
- Many old chimneys used traditional lime mortar, which is softer and more malleable than the cement used as mortar today. This allows old mortar to adapt to stress and release moisture easier. Generally, modern cement mortar is more durable and broadly available.
- 100-year-old chimneys are often repointed, which is the process of removing damaged mortar and replacing it with new mortar. For old chimneys, lime mortar is used again, as modern cement is hard and can damage old bricks.
- Historical buildings are often professionally maintained. For old chimneys, this can mean resealing, adding modern caps, and waterproofing.
Sealing a brick chimney is just another way to extend the life of your home, saving you repair costs at the same time.
Real brick chimneys will absorb water because they are made from natural materials. Water absorption can be a problem if the water is allowed to freeze and expand. When water fills a small open space in a brick or the mortar, it usually causes a chip to fall away, leaving a rough surface behind.
If you discover this chipping has affected your chimney, the chimney is likely made from real bricks. Often, you will find these chips with your lawnmower, so it’s a good idea to inspect the area at the base of a brick chimney before mowing the grass. These chips are functionally rocks when impacted by a mower blade, and they present a danger to those nearby. Chipping isn’t usually a problem for old chimneys with lime-based mortar that allows retained moisture to evaporate more quickly.
Do You Need to Reseal Other Components on the Roof?
To extend the life of your roof and its components it’s a great idea to reseal any flashing, nail heads, or other potential leak locations. Ideally, you should plan the project to include enough time to reseal the entire roof at once. This will minimize the number of trips up and down a ladder, plus you’ll already have the materials ready to go.
100% silicone exterior grade sealant roof sealant is available in tubes. You’ll use this sealant for vertical sealing, where the sealant needs to stay in place until it cures. A good example would be resealing the nail heads on a ridge cap shingle, or sealing any exposed nail heads on a chimney’s base flashing.
You will also want a liquid sealer that can be sprayed from a garden sprayer, as this will reduce the labor exponentially, especially when additional coats are required. A simple pump garden sprayer is fine, but if you have a paint sprayer that’s fine too. Just follow the directions on the can closely, as some may require a larger spray tip than your sprayer offers.
On a sloped roof, a brick chimney is the first of many possible points to reseal. All penetrations, like pipe boots around plumbing vents or electrical masts, should also be resealed and checked for compromising UV damage.

(Left) A silicone-based pipe boot. (Right) An electrical mast flashed with a split pipe boot.
You’ll also want to inspect other transition points that use flashing, such as roof to wall transitions at dormer walls or headwalls. Penetrations like skylights and slope intersections like valleys might also need attention. After resealing, remove any loose caulk.
Do Brick Chimneys Need a Cap?
Many building codes enforced today require a chimney cap to be installed on newly constructed buildings. However, older homes may not have a chimney cap, or the chimney may have been permanently closed at the damper.
Brick chimneys without a chimney cap will allow water to fall down the chimney onto the fireplace or stove, causing rusting of the damper and mold growth. Chimney caps essentially work as an umbrella for the chimney, allowing smoke to escape while keeping water out.
If your chimney doesn’t have a chimney cap, you’ll need to install one. Chimney caps are fairly lightweight and typically attached with masonry screws, like a TapCon. Most even have a handy nailing flange, so a bead of sealant under the flange and a few screws should do the trick, but always follow the provided directions.

A cladded chimney that toppled during a windstorm. The metal chimney chase has detached from the chimney’s frame. Sided chimneys almost always have chases that both protect the chimney’s shaft from water infiltration and divert rainwater away from the chimney.
Recommended Materials & Tools for Resealing a Brick Chimney
What Materials Do You Need to Reseal a Brick Chimney?
If you plan to seal the entire chimney, which is recommended, you’ll want a liquid waterproofing agent that is sprayable. If visible cracks can be seen in the mortar, you’ll want to use a caulk sealer applied with a caulk gun. If you prefer, you can fill the cracks with dampened cement using a trowel, then apply the sealer using a ¼” bead.
What Materials Do I Need to Reseal a Roof’s Components?
Aside from the safety gear you’ll just need a few hand tools to reseal a brick chimney and any other roof components. If you need to also make repairs to any channel flashing, you will also need an appropriate circular saw, masonry blade, and a respirator to avoid breathing in the dust created.
Here’s a list of the most common tools you’ll need to reseal a brick chimney:
- Ladder or Lift: Always secure ladders with stabilizers and standoffs as needed. Never climb an unstable ladder.
- Paint Brush: Used to apply liquid sealer.
- Caulk Gun: Only required if you apply caulk sealer from a tube.
- Scraper or Putty Knife: Removes loose caulk and allows for a consistent caulk appearance.
- Garden Sprayer: Allows you to spray liquid sealer onto the entire chimney quickly.
- Trowel: Used to smooth out mortar repairs before resealing the area.
- Bucket: A gallon bucket allows you to safely transport tools and materials to the roof. It can also be used to remove debris and tools from the roof when the job is complete.
- Optional Tools:
- Circular Saw & Masonry Blade: You won’t need these tools unless you need to add counter flashing to your brick chimney.
Essential Safety Gear When Resealing Your Brick Chimney
Depending on how you plan to access all four sides of the chimney, you should consider whether calling in a pro is warranted. By design, chimneys are among the highest points of your home, so before you use any tools, determine if you have the mobility and balance to perform the work safely.
Many times, even experienced DIYers contact professionals when a chimney is 20+ feet tall, because the tools and safety gear required are expensive, and necessary. If you’re unable to safely access your chimney for any reason, especially if your roof has an exceptionally steep roof, it’s always best to hire a pro the first time and see which tools they use.
If you’ve determined you have the physicality and tools for the job, you’ll need to keep yourself safe. Use an arresting harness if there is any potential for a fall, and always have another person available, even if it’s a child with a phone, in case of an accident.
You may find it easiest to do the sealing from a ladder, or a combination of ladders and a walkboard. Be sure and secure the ladders to the exterior wall whenever possible. Many ladders and standoffs now come with built in clamps designed to clip onto a gutter for stability.
If the ground is uneven, use built-in leveling feet if your ladder has them, or dig a small hole in the ground to accept whichever leg is longest. Regardless, make sure your ladder is stable and secure before climbing it. The higher you ascend on the ladder, the more dramatically small movements will affect the ladder’s movement, so remain steady and deliberate.
If you have the budget the easiest and safest way to access the chimney is with a mechanical lift. Homeowners can rent these machines locally, and some are small enough to pull with a pickup truck. These lifts often have four extendable legs for balance, and an articulating arm.
The user can control the movements from inside the basket, or a helper can control the lift from the ground to move in all four directions, and up and down. These lifts are dependent on remaining level, so make sure someone is available to operate the lift from the ground.
If your weight accidentally causes the lift to shift out of level, these lifts are designed to become inoperable to avoid toppling. A helper on the ground can readjust the lift back to a level position, which will re-enable the lift’s power.
How Do I Know Which Type of Roof I Have?
There are two primary types of roofs: pitched (steep slope) or flat (low slope). Pitched roofs use gravity to channel water into the gutters. The gutters are attached to vertical downspouts, which transport the runoff to the ground.
Low slope roofRoof Types - Low-slope roofs (flat roofs) are a type of roof system with less than a 3:12 pitch, most commonly found on commercial and industrial buildings. More designs are mostly used in the commercial building industry, as they are designed with greater emphasis on functionality than aesthetics. Low slope roofs often have gutters, but most use internal drainsComponent - An internal drain is a roof drain installed in the roof surface that collects water and directs it into piping inside the building. More at various locations on the roof or scuppers located along the exterior walls.
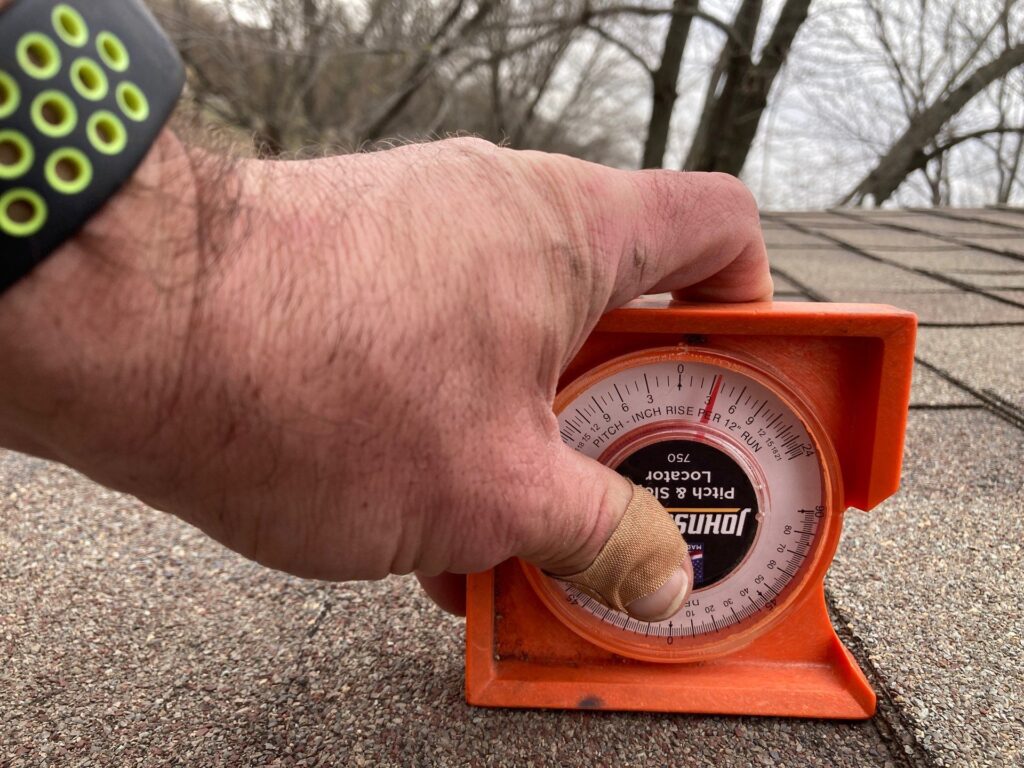 Most residential homes have sloped roofs with a pitch ranging from 4:12 to 8:12. Some homes have even steeper slopes, such as A-frame homes. These are often sloped to a 12:12 pitch, which equates to a 45-degree angle.
A plurality of homes built between the 1940’s and 1990’s have a 4:12 pitch, which is much easier to walk and work on than a roof with an 8:12 pitch. As home designs have evolved, many roofs now have an 8:12 roof pitch, as this makes the usable space in the attic larger. Roofers working on slopes of 9:12 or higher often use 2x4s as roof jacks or brackets. Exercise caution when mounting a steep roof like this and use appropriate safety measures like a harness or roof jacks.
How to Safely Transport Resealing Materials to the Roof
As long as you do it as safely as possible, you can transport the materials to the roof in a few ways. Some DIYers just tie a rope to a 5-gallon bucket, put the tools in, and pull the bucket up to the roof. This method is common due to its simplicity, but remember that the bucket will also pull on you, so take caution to position yourself away from the edge.
You can also use a helper to hand the materials to you, but they should not carry so much weight that climbing the ladder is difficult. They should also attempt to use a bucket or pouch when possible, as this keeps both hands free to grip the ladder.
If the resealing project is unusually large and time consuming, it may be practical to rent a mechanical lift. These lifts come in all shapes and sizes and can be delivered to your door. If renting the lift saves you time, labor costs, and improves safety, the total cost, and certainly time, of the project will likely go down.
DIY or Hire a Professional?
Is Chimney Resealing Safe for DIYers?
Resealing a chimney is a good project for a do-it-yourselfer if the proper safety steps are taken. Resealing a brick chimney doesn’t require elaborate skills, but you may be working near the edge of the roof, so safety gear, and the knowledge to use it, are critical.
Never attempt to ascend any roof if you don’t feel confident you have the mobility or balance to do it safely. Even if you do, always wear the appropriate safety gear for the job, such as eye and skin protection, and fall protection, such as an arresting harness.
Always work with a helper or at least have someone nearby to assist if needed. In the event of an accident, having a helper available can make the difference in an emergency.
Also avoid walking on a sloped roof when the roof’s surface is wet. Water will reduce the amount of friction on the roof’s surface, making a fall more likely. For the same reason, avoid walking on anything green, like moss or fungi, as these will contain moisture that can affect your traction.
How-To Instructions: How to Reseal a Brick Chimney
How to Reseal a Brick Chimney Using a Caulk Sealer
If you just need to fill in a few small cracks in the bricks or mortar, masonry caulk sealer is the best option. These are applied using a standard caulk gun, which provides excellent control. Just follow the directions on the tube and note the caulk’s acceptable temperature range.
Pros typically cut a ¼” opening in the tube and puncture the inner seal with a long screwdriver or wire. Most masonry caulk sealers are available in standard 10-ounce tubes, but you can use the larger 20+ ounce versions for larger jobs. Just remember you’ll need a matching caulk gun if you decide to upgrade to the larger tube.

A true brick chimney with no cap before being resealed.
How to Reseal a Brick Chimney Using Liquid Sealer
Step 1: Check the weather
The brick and mortar will generally need to be dry to accept the sealer. Unless directed differently by the manufacturer, only apply a liquid sealer when the temperature outside is 50-degrees Fahrenheit or above, and the surface of the chimney is dry.
Step 2: Mix the sealer
Following the label’s directions. This usually involves either thinning the liquid sealer or pouring it undiluted into the sprayer. Most pros use a fancy on-demand spray system, but a garden sprayer works just fine. Calculate the amount needed using the directions on the can and the surface area of your chimney.
Step 3: Spray the sealer
Spray the liquid sealer as directed, making sure to overlap each course with the next. The sealer may change the way light reflects from the brick, so make sure it completely covers the chimney’s surface area.
The sealant’s label will suggest that you wait for a time between coats, depending on the temperature. In warm temperatures the sealer may dry within seconds, but in cooler temperatures the sealer may need 20 minutes or more before applying subsequent coats.
Step 4: Reapply as needed
The first coat is usually absorbed quickly by the porous bricks and mortar, so additional coats add coverage and deepen saturation. Once cured, this built-up coating resists UV radiation and is hydrophobic, meaning it repels moisture.
What Is Channel Flashing?
Those not in the construction industry may be unfamiliar with a type of flashing reserved primarily for use on masonry. Channel flashing is a specially formed flashing that fits inside a grooved mortar joint, or into a groove cut into the bricks themselves. It’s designed to integrate with the vertical surface as a waterproofing method.
The shape of channel flashing is much like step flashing, which is installed in an overlapping manner between the roof material and a vertical surface. The difference is that channel flashing has an extra bend at the top, which extends from the backside of the flashing towards the chimney.
Pros often use a masonry blade on a circular saw to cut the necessary groove into the chimney, as this is the fastest method. Pros mark a line and set the blade depth to about ½”. As the saw contacts the brick it carves out a slot about ⅛” thick and ½” deep, which is perfect to accept the edge of the channel flashing.
Flashing is installed with the painted or treated side facing outward. The vertical bend, also called the return flange, slides into a groove cut into the mortar line. Usually, these cuts are made in the horizontal mortar joints for easier cutting. After the flange is inserted, the groove is sealed with compatible caulk to prevent water from entering, freezing, and expanding, which can cause cracks.
When needed, pros can strike a chalk line that follows the roof’s pitch. This allows them to cut a groove that aligns with the roof’s slope. Some installers will skip the grooving step and attempt to glue the flashing to the chimney, but the most experienced installers will take the time to cut a groove.
Where to Find Free Expert Advice on Chimney Resealing?
The easiest way to get free advice from a chimney sealing expert is to ask them for a free inspection. Most are happy to help, and welcome any questions you may have. Savvy DIYers pick the brains of the pros to determine if they should tackle a project or not. Many hire a pro the first time, watch closely, and try a future repair on their own using their experience.