What Is Heater Flue Flashing and What Does It Do?
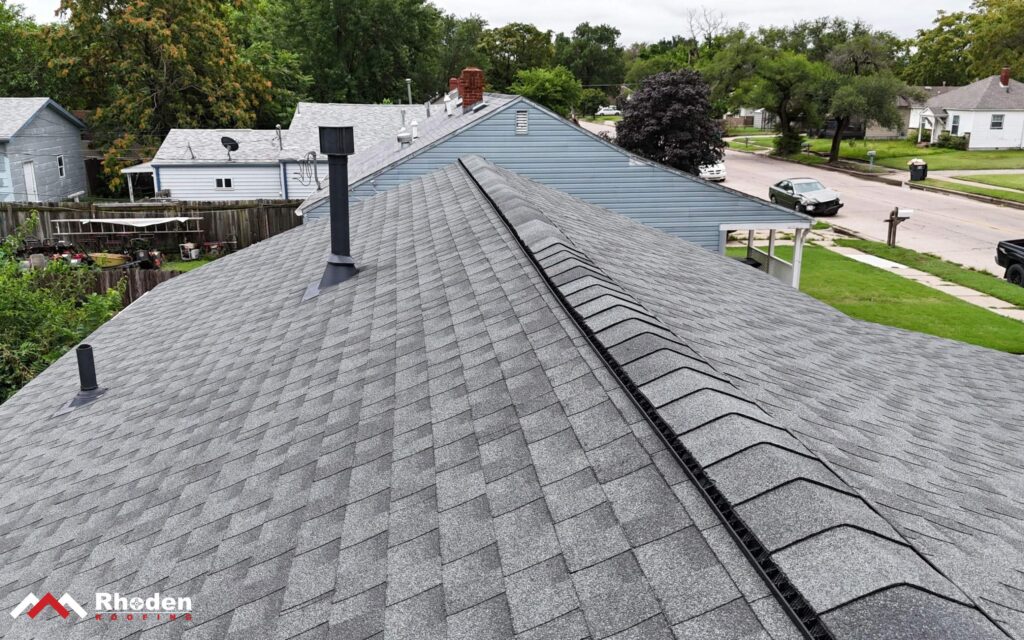
Heater flue flashing seals the area where a heater’s vent pipe passes through the roof’s surface, preventing water intrusion while allowing exhaust gases to escape safely. Heater flues are installed on nearly every house with a gas furnace, hot water heater, or gas fireplace that vents through the roof, making it one of the most common roofing components.
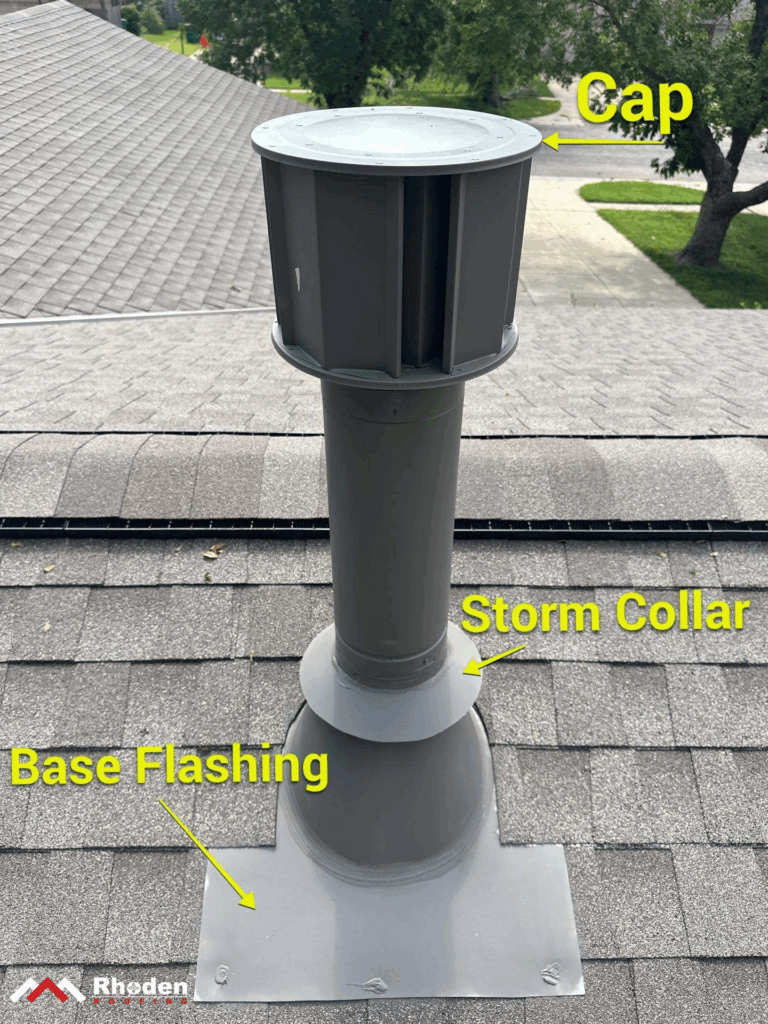
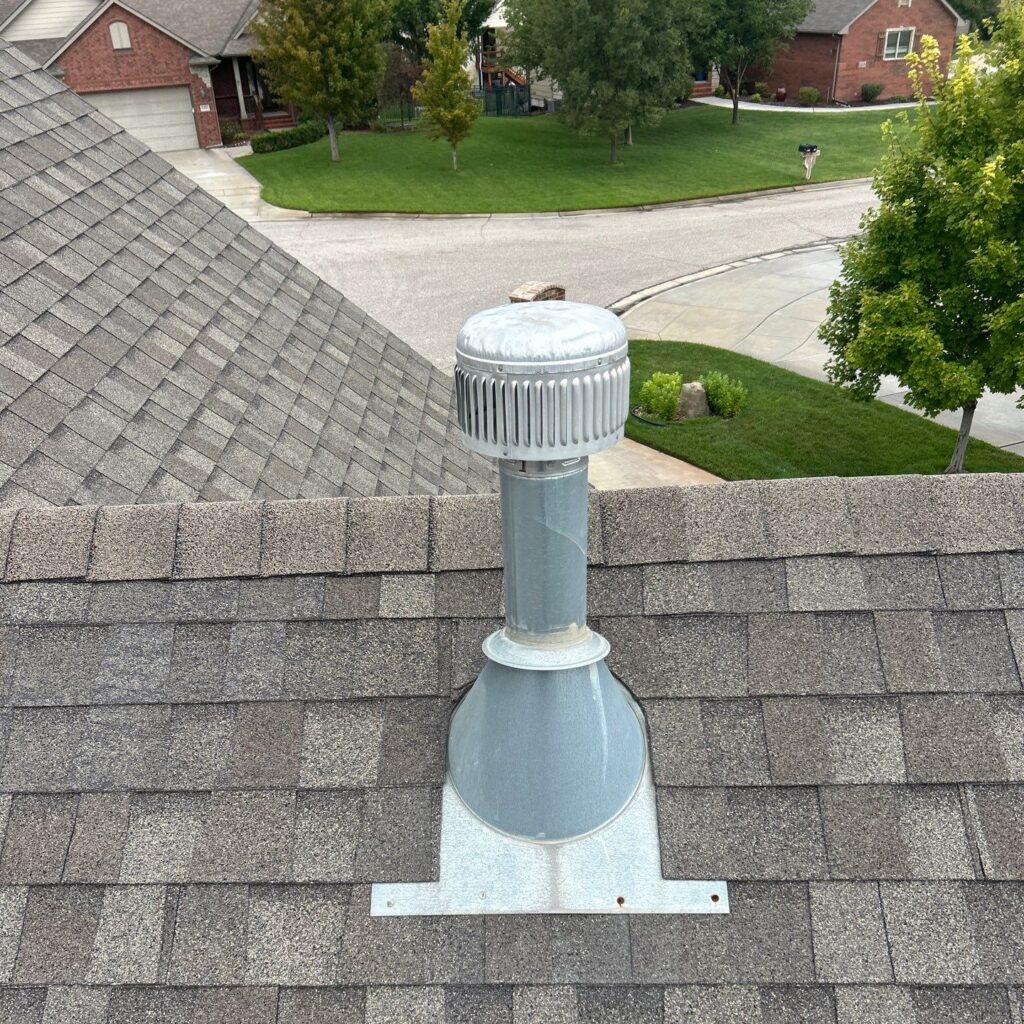
Heater flue flashing typically refers to three separate parts:
-
- Base Flashing (Pipe Jack): A single metal piece that integrates with the shingles, lying flat on the roof’s surface and extending upward to envelope the base of the flue with a metal cone, channeling water away from the penetration.
- Storm Collar: A convex, tight-fitting ring that seals the joint between the base flashing and the flue.
- Cap: Placed at the top of the flue to keep water out while allowing exhaust air to pass freely.
UV-resistant sealant is then applied to the fasteners that secure the base flashing and around the top of the collar to prevent water infiltration.
Expected Service Life of Heater Flue Flashing
Heater flue flashing typically remains effective for 15-20 years, depending on material and installation quality, UV exposure, and maintenance.
The vent pipe itself generally outlasts its flashing. It can remain functional for several decades, absent corrosion or acute damage. In many older homes, we often find original vent pipes with flashing that has been replaced two or more times.
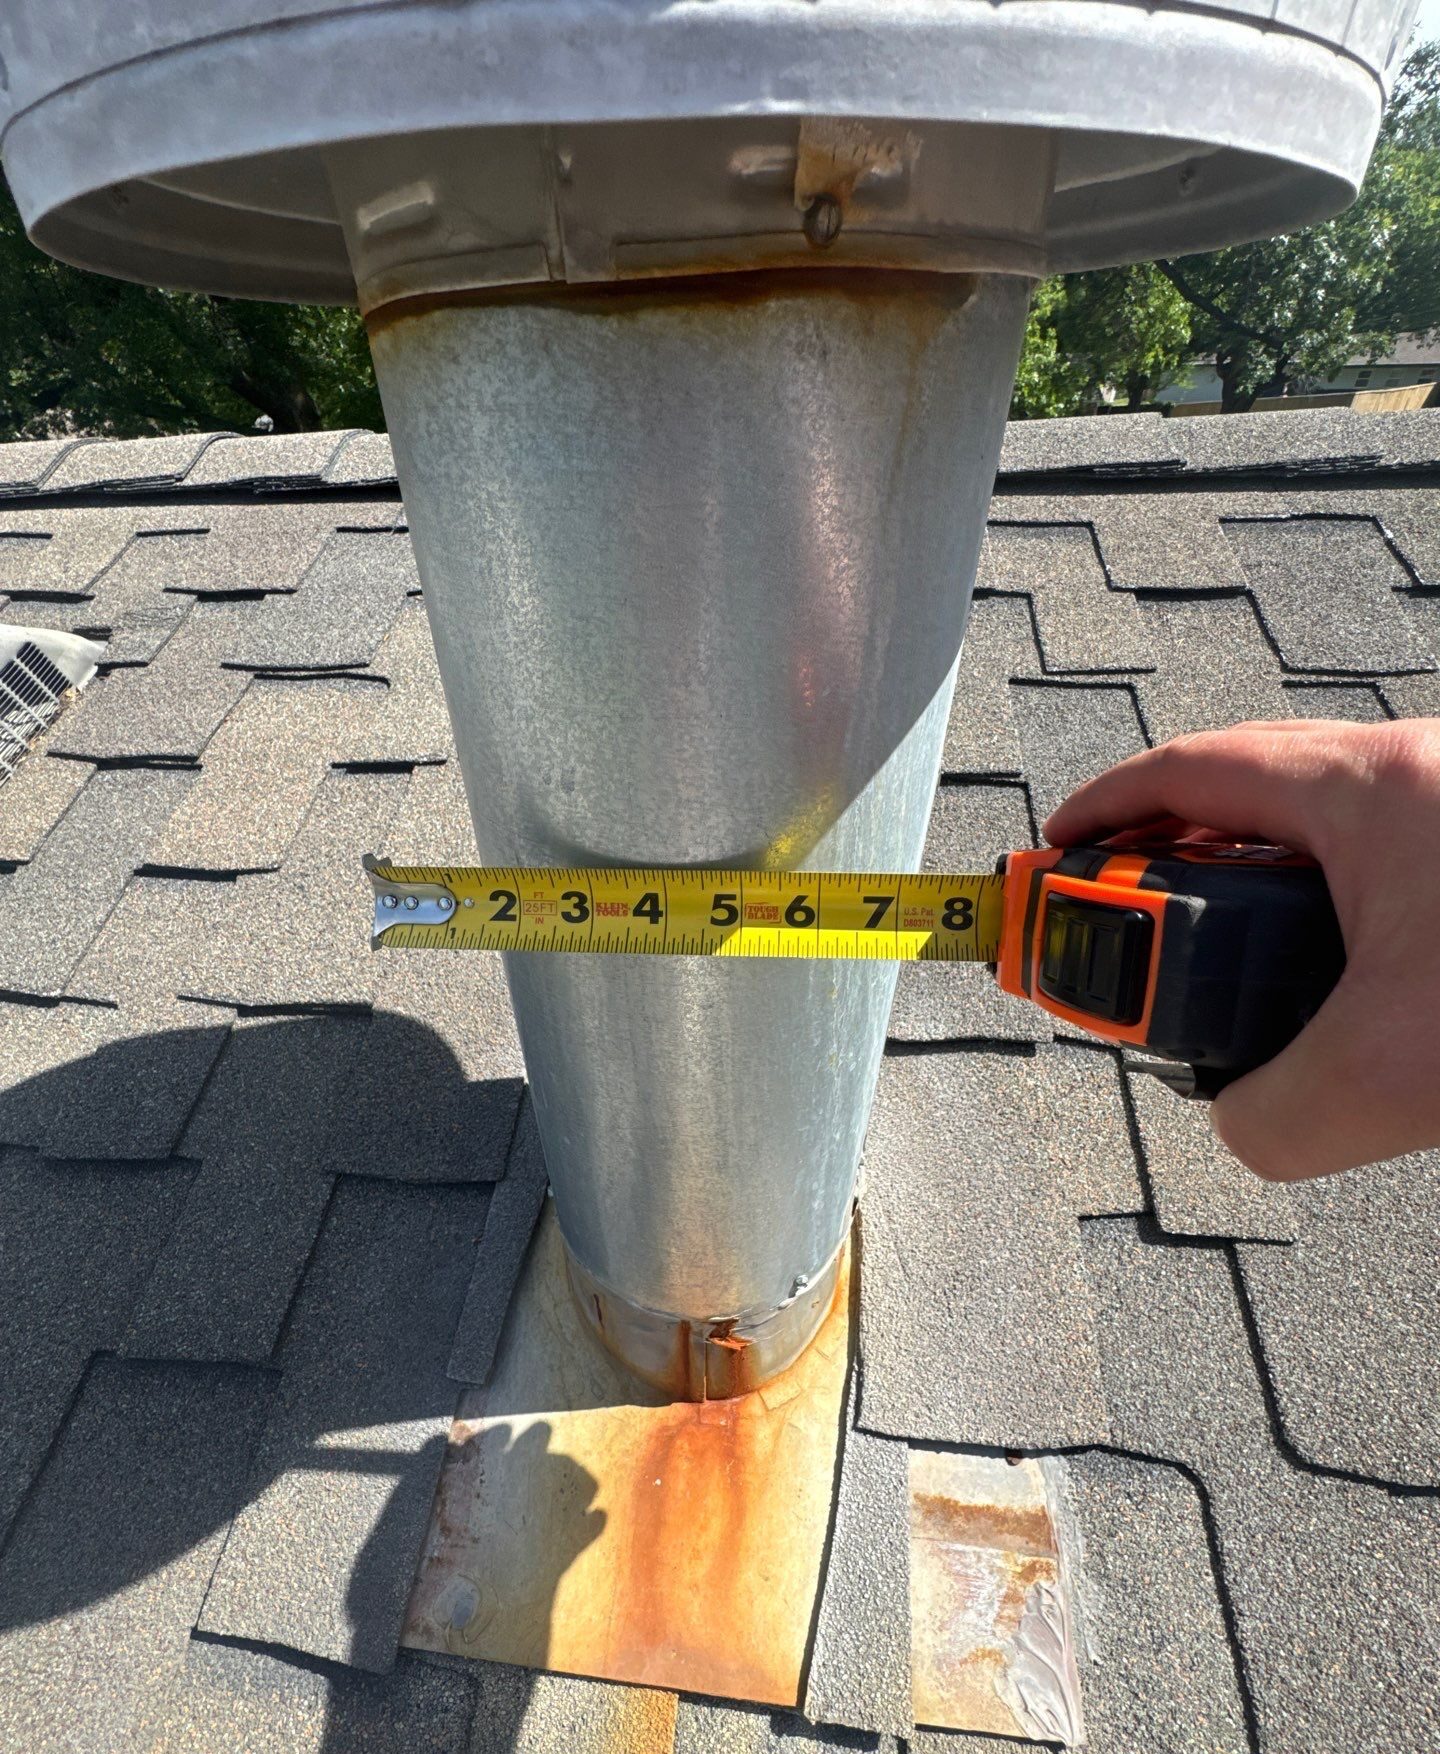
Collars, which rely on sealant, protect heater flue flashings’ most vulnerable part: the intersection of the base flashing and the vent pipe. To protect this vulnerability on standard 6” flues, we install two collars: an adjustable 5-6” collar sized to the pipe, topped with a fitted 6” collar. For atypically sized heater flues, we install two adjustable collars with staggered seams. This layer of redundancy further protects a penetration that is often a source of leaks.
Evaluating & Addressing Heater Flue Condition at Different Lifecycle Stages
0-5 Years: New Installation – Evaluating for Correct Installation
Heater flue flashing is made from aluminum, which can be painted. If painted, it will have a continuous coat of paint from the base flashing to the cap. The base flashing’s fasteners on the downslope side should be completely covered with UV-resistant sealant. Because new metal flashing is installed, no dents should be visible on the cap, base flashing, or collar.
-
- Oversized or Undersized Collar: An adjustable 7-8” collar can be used on a 6” flue. It will need re-sealed monthly, not yearly, but it is possible. To avoid placing unnecessary stress on the collar material or sealant, correctly sized collars are required.
- Improperly Rated Material: If you invest in a new heater that exhausts gasses hotter than 600 degrees Fahrenheit, be mindful that standard aluminum heater flues can lose functionality, as rivets can begin to pop out. These heaters should exhaust through a stack (i.e., a chimney) or the aluminum heater flue should be replaced with a more heat-resistant material.
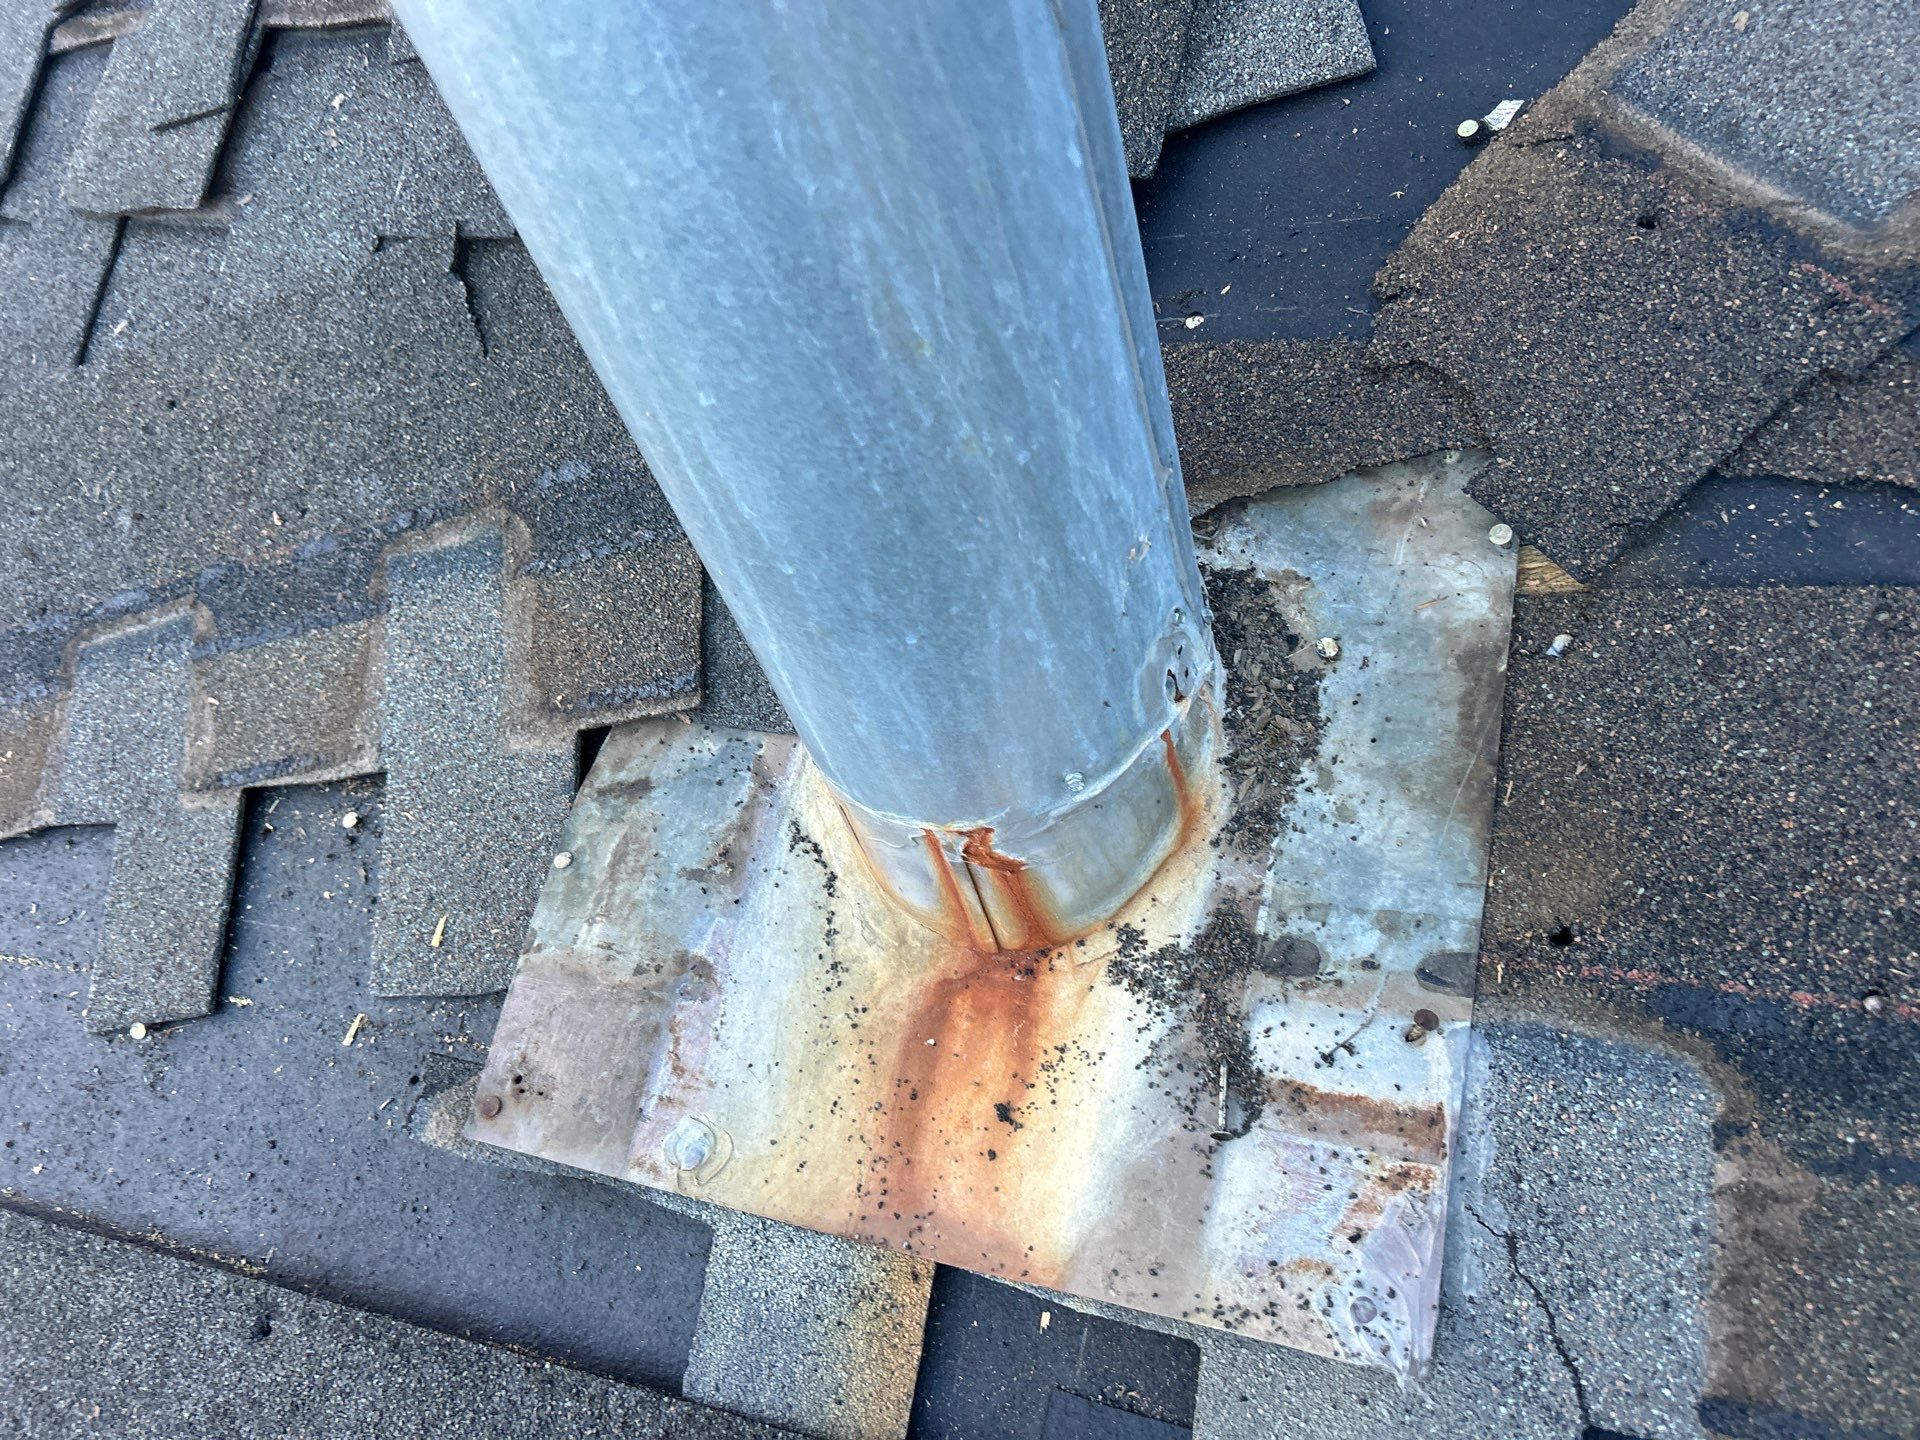
- Exposed Nail Heads or Loose Nails: Exposed fasteners on the downslope side of the base flashing invite leaks. They must be fully sealed with UV-resistant caulk or replaced if backing out.
- Shingles Overlapping the Base Flashing’s Vertical Cone: Shingles should overlap the outer edge of the base flashing, except for the exposed downslope side. They should not, however, overlap the vertical cone of the base flashing. This retains water, risking water intrusion under the shingles and rust at the
- Incorrect Roof Pitch: The base flashing’s cone is intended to rise at a 90-degree angle from the roofline. An improperly angled cone can leave gaps between the cone and flue. Additionally, the cap might not adequately prevent water from falling into the flue.
5-10 Years: Normal Weathering – What to Monitor
After a few years of service, we shift from checking for correct installation to monitoring the early effects of weather exposure. At this stage in heater flue flashing’s service life, most changes are cosmetic rather than functional.
-
- Minor Hairline Cracks on Drying Sealant: The UV-resistant sealant around the collar and over the base flashing’s fasteners may begin to dry up and produce minor hairline cracks.
- Surface Discoloration: Subtle discoloration from UV exposure can appear on both the sealant and the flue, especially if it’s painted. It’s the roofing equivalent of sun-bleached patio furniture: still functional, just lighter in color.
- Minor Damage to Metals: Small indents from hail, tree limb abrasions, or incidental damage are common after a few years, especially on the cap.
Maintenance: Reapply sealant or none.
After a few years of wear, typical heater flue flashing should be performing well. Cosmetic corrections, like cleaning or repainting, can restore its original appearance, but are not required. Minor, surface-level or hairline cracking of sealant is usually cosmetic, although reapplying sealant can preempt any potential avenues for water from progressive wear. Early reapplication of sealant is elective, not required at this point. While it might qualify as insurable damage, pitted metals on the flue’s cap do not typically affect its ability to keep water out unless craters that collect water are formed on the cap or the metal is fractured or deformed.
Standard non-coated aluminum heater flue flashing a few years into its service life is likely to have hail dents on its cap, deteriorated sealant at its storm collar, and exposed fasteners on its base flashing. Dents in the cap metal might suggest insurable damage, but it has minimal impact on the cap’s performance. Our recommendation for heater flue flashing in this condition is typically to reapply sealant to the storm collar and over exposed fasteners.
5-20 Years: Developing Signs of Aging – Proactive Care Recommendations
As the flashing continues to age, cosmetic wear can progress into material deterioration. Over time, acute damage, such as a tree limb impacting the storm collar, can escalate into necessary repairs. Timely identification of progressive wear symptoms or sudden acute damage allows for proactive repairs before the system fails.
-
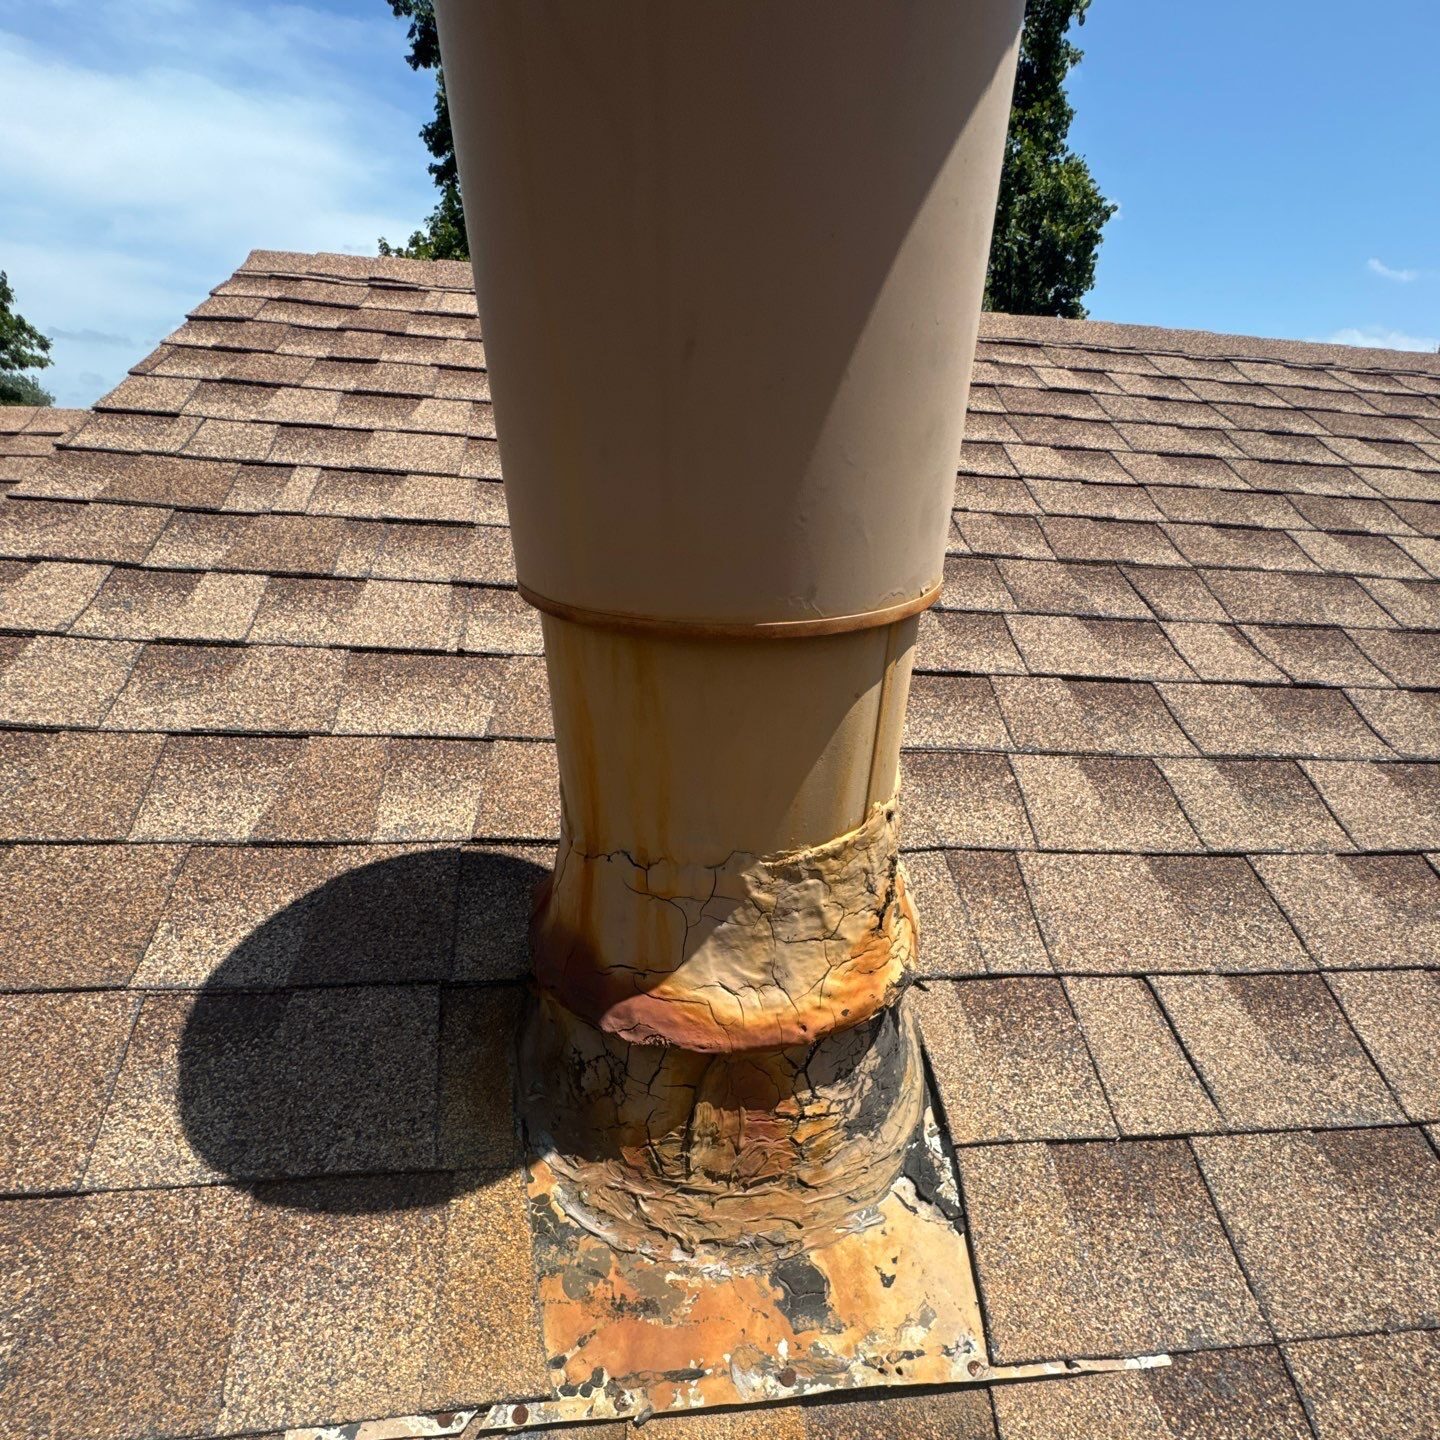
- Cracked or Warped Collar Material: Years of sustained UV exposure and dents from hail or tree limbs may cause the collar to crack or become misshapen. This deformation can break the collar’s seal and open a path for water infiltration.
- Exposed or Loose Fasteners Securing the Base Flashing: Deteriorated sealant around the base flashing’s fasteners allows water to seep into the fasteners’ holes. This can cause the fasteners to back out, creating an additional vulnerability.
- Deteriorated Sealant Around Flashing Edges: Two common sealant failure points are 1) where the base flashing’s cone meets the vent pipe, and 2) the top of the storm collar. Sealant here may be degraded entirely or appear dry, cracked, or crumbled, leaving visible gaps.
Maintenance: Sealant reapplication and collar replacement.
If the storm collar is misshapen or cracked, it needs replaced, not resealed. Paired with a fresh application of UV-resistant sealant, this replenishes the seal before leaks can develop. At this point in heater flue flashings’ service life, sealant should be reapplied at the collar, base flashing, and cap to prevent leaks from forming. While exposed nail heads can be quickly corrected with sealant, backed out fasteners will need hammered down. If the fasteners have begun to back out and the base flashing has warped as a result, it will need replaced, but this is uncommon.
15-20+ Years: Failure & Replacement – Knowing When it’s Time
The functional life cycle of a roof component is determined by its ability to keep water out. The transition from normal aging to concerning wear isn’t always clear. To clarify what these thresholds are, we created an inspection checklist to standardize our recommendations, ensuring that suggested only when it’s necessary. Similar to how an insurance adjuster defines “totaled” on a car, we only recommend component replacement when the cost to replace a component or roof is less than the expected cost of damages over the next 12 months.
Based on our experience identifying and fixing roof leaks on over 13,000 homes and buildings, here are our criteria for when we recommend replacement of heater flue flashing:
- Corroded metal deterioration with active pitting rust or rust located where sealant is applied. Pitting rust compromises the material and makes it ineffective at its job: to keep water out. Small signs of oxidation near the base flashing’s cone will not immediately affect performance; however, rust where the cone or storm collar seals around the heater flue will prevent sealant from adhering, which creates gaps that water will find.
- Warped base flashing. Deformation compromises the metal’s ability to seal and allows water to migrate under the flashing.
- Abrasive damage or cracks that are more than half the thickness of the material – such as from a branch falling, hail impact, or maintenance error.
- Water intrusion – If moisture has already found its way through the flashing and into the interior, the flashing needs replaced. Interior leaks will be visible as discoloration to surrounding wood or insulation, grime lines or staining on the flue itself within the attic, mold, or wet spots on drywall or sheetrock below.
Rusted Heater Flue Base Flashing with Previous Repairs

Pulled Out Fasteners on Warped Heater Flue Base Flashing
Rust Through Heater Flue Base Flashing and Overlapping Shingles on Base
No Storm Collar and Rust Through Base Flashing
Frequently Asked Questions (FAQ)
How are heater flue flashings installed?
Why is my heater flue so tall?
Occasionally, older homes feature heater flue pipes that are taller than the roof’s highest ridge. That’s a throwback to antiquated building codes, which required flue caps to rise at least two feet above any point of the roof within 10 feet horizontally. When we re-flash one of these older heater flues, especially on steep roofs (i.e., 8:12 or greater), we might trim a couple of inches off the neck. This allows us to reach the top to apply the cap without affecting its function.
Can I paint my heater flue?
How often should I have my heater flue and flashing inspected?
Will a home inspector flag flashing damage?
If I see rust on heater flue flashing, does it always need replaced?
This article is part of our ‘Roof Component Inspection & Service Life’ Series. Learn more about:
Roof Covering
Flashing
Roof Vents
Roof Drainage